会社でポストエフェクトを担当することになりました。ポストエフェクトといえば,川瀬さんが超絶有名です。
そんなわけで,川瀬さんが公開している資料からグレアエフェクトについて学んでみようと思います。
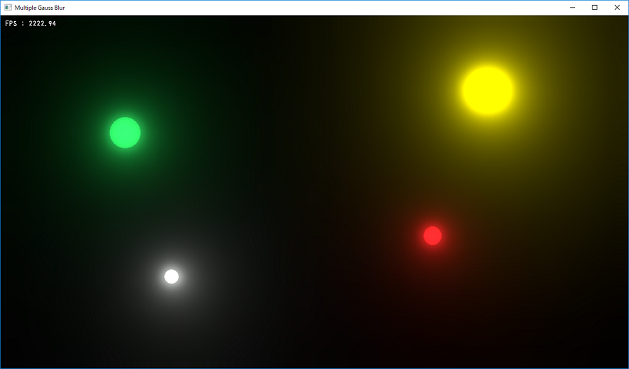
今回は川瀬式グレアエフェクトの中から,ブルームとスターを実装する要素技術について勉強してみます。


00007:  ///////////////////////////////////////////////////////////////////////////////////////////////////
00008:  // VSOutput structure
00009:  ///////////////////////////////////////////////////////////////////////////////////////////////////
00010:  struct VSOutput
00011:  {
00012:      float4 Position : SV_POSITION;
00013:      float2 TexCoord : TEXCOORD;
00014:  };
00015:
00016:  ///////////////////////////////////////////////////////////////////////////////////////////////////
00017:  // CBuffer structure
00018:  ///////////////////////////////////////////////////////////////////////////////////////////////////
00019:  cbuffer CbBlur
00020:  {
00021:      int     SampleCount : packoffset(c0);
00022:      float4  Offset[16]  : packoffset(c1);
00023:  };
00024:
00025:  //-------------------------------------------------------------------------------------------------
00026:  // Textures and Samplers.
00027:  //-------------------------------------------------------------------------------------------------
00028:  Texture2D       ColorBuffer  : register(t0);
00029:  SamplerState    ColorSampler : register(s0);
00030:
00031:  //-------------------------------------------------------------------------------------------------
00032:  //      メインエントリーポイントです.
00033:  //-------------------------------------------------------------------------------------------------
00034:  float4 main(const VSOutput input) : SV_TARGET0
00035:  {
00036:      float4 result = 0;
00037:
00038:      for(int i=0; i<SampleCount; ++i)
00039:      { result += Offset[i].z * ColorBuffer.Sample(ColorSampler, input.TexCoord + Offset[i].xy); }
00040:
00041:      result.w = 1.0f;
00042:
00043:      return result;
00044:  }
00023:  //-------------------------------------------------------------------------------------------------
00024:  //      ガウスの重みを計算します.
00025:  //-------------------------------------------------------------------------------------------------
00026:  inline float GaussianDistribution( const asdx::Vector2& pos, float rho )
00027:  {
00028:      return exp( -( pos.x * pos.x + pos.y * pos.y ) / (2.0f * rho * rho ));
00029:  }
00030:
00031:  //-------------------------------------------------------------------------------------------------
00032:  //      ブラーパラメータを計算します.
00033:  //-------------------------------------------------------------------------------------------------
00034:  inline GaussBlurParam CalcBlurParam( int width, int height, asdx::Vector2 dir, float deviation )
00035:  {
00036:      GaussBlurParam result;
00037:      result.SampleCount = 15;
00038:      auto tu = 1.0f / float(width);
00039:      auto tv = 1.0f / float(height);
00040:
00041:      result.Offset[0].z = GaussianDistribution(asdx::Vector2(0.0f, 0.0f), deviation);
00042:      auto total_weight = result.Offset[0].z;
00043:
00044:      result.Offset[0].x = 0.0f;
00045:      result.Offset[0].y = 0.0f;
00046:
00047:      for(auto i=1; i<8; ++i)
00048:      {
00049:          result.Offset[i].x = dir.x * i * tu;
00050:          result.Offset[i].y = dir.y * i * tv;
00051:          result.Offset[i].z = GaussianDistribution( dir * float(i), deviation );
00052:          total_weight += result.Offset[i].z * 2.0f;
00053:      }
00054:
00055:      for(auto i=0; i<8; ++i)
00056:      {
00057:          result.Offset[i].z /= total_weight;
00058:      }
00059:      for(auto i=8; i<15; ++i)
00060:      {
00061:          result.Offset[i].x = -result.Offset[i - 7].x;
00062:          result.Offset[i].y = -result.Offset[i - 7].y;
00063:          result.Offset[i].z =  result.Offset[i - 7].z;
00064:      }
00065:
00066:      return result;
00067:  }


00279:  //---------------------------------------------------------------------------------------
00280:  //      描画時の処理です.
00281:  //---------------------------------------------------------------------------------------
00282:  void SampleApplication::OnFrameRender( double time, double elapsedTime )
00283:  {
00284:      auto pSrcSRV = m_InputTexture.GetSRV();
00285:      auto pDstRTV = m_PingPong[0].GetRTV();
00286:
00287:      auto w = m_Width  / 4;
00288:      auto h = m_Height / 4;
00289:      auto deviation = 2.5f;
00290:
00291:      // 最初のパス.
00292:      {
00293:          // クリア処理.
00294:          m_pDeviceContext->ClearRenderTargetView( pDstRTV, m_ClearColor );
00295:
00296:          // 出力マネージャに設定.
00297:          m_pDeviceContext->OMSetRenderTargets( 1, &pDstRTV, nullptr );
00298:
00299:          float blendFactor[4] = { 1.0f, 1.0f, 1.0f, 1.0f };
00300:          UINT sampleMask = D3D11_DEFAULT_SAMPLE_MASK;
00301:          // ステートを設定.
00302:          m_pDeviceContext->RSSetState( m_pRasterizerState );
00303:          m_pDeviceContext->OMSetBlendState( m_pOpequeBS, blendFactor, sampleMask );
00304:          m_pDeviceContext->OMSetDepthStencilState( m_pDepthStencilState, m_StencilRef );
00305:
00306:          // シェーダの設定.
00307:          m_pDeviceContext->VSSetShader( m_pFullScreenVS, nullptr, 0 );
00308:          m_pDeviceContext->GSSetShader( nullptr, nullptr, 0 );
00309:          m_pDeviceContext->HSSetShader( nullptr, nullptr, 0 );
00310:          m_pDeviceContext->DSSetShader( nullptr, nullptr, 0 );
00311:          m_pDeviceContext->PSSetShader( m_pGaussBlurPS, nullptr, 0 );
00312:
00313:          // シェーダリソースビューを設定.
00314:          auto pSRV = m_InputTexture.GetSRV();
00315:          m_pDeviceContext->PSSetShaderResources( 0, 1, &pSrcSRV );
00316:          m_pDeviceContext->PSSetSamplers( 0, 1, &m_pPointSampler );
00317:
00318:          D3D11_VIEWPORT viewport;
00319:          viewport.TopLeftX   = 0;
00320:          viewport.TopLeftY   = 0;
00321:          viewport.Width      = float(w);
00322:          viewport.Height     = float(h);
00323:          viewport.MinDepth   = 0.0f;
00324:          viewport.MaxDepth   = 1.0f;
00325:
00326:          m_pDeviceContext->RSSetViewports( 1, &viewport );
00327:
00328:          auto pCB = m_BlurBuffer.GetBuffer();
00329:          GaussBlurParam src = CalcBlurParam(w, h, asdx::Vector2(1.0f, 0.0f), deviation, 1.0f);
00330:          m_pDeviceContext->UpdateSubresource( pCB, 0, nullptr, &src, 0, 0 );
00331:          m_pDeviceContext->PSSetConstantBuffers( 0, 1, &pCB );
00332:
00333:          // 描画.
00334:          m_Quad.Draw(m_pDeviceContext);
00335:
00336:
00337:          pDstRTV = m_PingPong[1].GetRTV();
00338:
00339:          // クリア処理.
00340:          m_pDeviceContext->ClearRenderTargetView( pDstRTV, m_ClearColor );
00341:
00342:          // 出力マネージャに設定.
00343:          m_pDeviceContext->OMSetRenderTargets( 1, &pDstRTV, nullptr );
00344:
00345:          // シェーダリソースビューを設定.
00346:          pSRV = m_PingPong[0].GetSRV();
00347:          m_pDeviceContext->PSSetShaderResources( 0, 1, &pSRV );
00348:          m_pDeviceContext->PSSetSamplers( 0, 1, &m_pPointSampler );
00349:
00350:          src = CalcBlurParam(w, h, asdx::Vector2(0.0f, 1.0f), deviation, 1.0f);
00351:
00352:          m_pDeviceContext->UpdateSubresource( pCB, 0, nullptr, &src, 0, 0 );
00353:          m_pDeviceContext->PSSetConstantBuffers( 0, 1, &pCB );
00354:
00355:          // ステートを設定.
00356:          m_pDeviceContext->RSSetState( m_pRasterizerState );
00357:          m_pDeviceContext->OMSetBlendState( m_pOpequeBS, blendFactor, sampleMask );
00358:          m_pDeviceContext->OMSetDepthStencilState( m_pDepthStencilState, m_StencilRef );
00359:
00360:          // 描画.
00361:          m_Quad.Draw(m_pDeviceContext);
00362:
00363:          // シェーダリソースをクリア.
00364:          ID3D11ShaderResourceView* nullTarget[1] = { nullptr };
00365:          m_pDeviceContext->PSSetShaderResources( 0, 1, nullTarget );
00366:
00367:          w >>= 1;
00368:          h >>= 1;
00369:
00370:          pDstRTV = m_PingPong[2].GetRTV();
00371:          pSrcSRV = m_PingPong[1].GetSRV();
00372:      }
00373:
00374:      float m = 2.0f;
00375:      for(auto i=1; i<5; ++i)
00376:      {
00377:          // クリア処理.
00378:          m_pDeviceContext->ClearRenderTargetView( pDstRTV, m_ClearColor );
00379:
00380:          // 出力マネージャに設定.
00381:          m_pDeviceContext->OMSetRenderTargets( 1, &pDstRTV, nullptr );
00382:
00383:          float blendFactor[4] = { 1.0f, 1.0f, 1.0f, 1.0f };
00384:          UINT sampleMask = D3D11_DEFAULT_SAMPLE_MASK;
00385:          // ステートを設定.
00386:          m_pDeviceContext->RSSetState( m_pRasterizerState );
00387:          m_pDeviceContext->OMSetBlendState( m_pOpequeBS, blendFactor, sampleMask );
00388:          m_pDeviceContext->OMSetDepthStencilState( m_pDepthStencilState, m_StencilRef );
00389:
00390:          // シェーダの設定.
00391:          m_pDeviceContext->VSSetShader( m_pFullScreenVS, nullptr, 0 );
00392:          m_pDeviceContext->GSSetShader( nullptr, nullptr, 0 );
00393:          m_pDeviceContext->HSSetShader( nullptr, nullptr, 0 );
00394:          m_pDeviceContext->DSSetShader( nullptr, nullptr, 0 );
00395:          m_pDeviceContext->PSSetShader( m_pGaussBlurPS, nullptr, 0 );
00396:
00397:          // シェーダリソースビューを設定.
00398:          auto pSRV = m_InputTexture.GetSRV();
00399:          m_pDeviceContext->PSSetShaderResources( 0, 1, &pSrcSRV );
00400:          m_pDeviceContext->PSSetSamplers( 0, 1, &m_pPointSampler );
00401:
00402:          D3D11_VIEWPORT viewport;
00403:          viewport.TopLeftX   = 0;
00404:          viewport.TopLeftY   = 0;
00405:          viewport.Width      = float(w);
00406:          viewport.Height     = float(h);
00407:          viewport.MinDepth   = 0.0f;
00408:          viewport.MaxDepth   = 1.0f;
00409:
00410:          m_pDeviceContext->RSSetViewports( 1, &viewport );
00411:
00412:          auto pCB = m_BlurBuffer.GetBuffer();
00413:          GaussBlurParam src = CalcBlurParam(w, h, asdx::Vector2(1.0f, 0.0f), deviation, m);
00414:          m_pDeviceContext->UpdateSubresource( pCB, 0, nullptr, &src, 0, 0 );
00415:          m_pDeviceContext->PSSetConstantBuffers( 0, 1, &pCB );
00416:
00417:          // 描画.
00418:          m_Quad.Draw(m_pDeviceContext);
00419:
00420:
00421:          pDstRTV = m_PingPong[i * 2 + 1].GetRTV();
00422:
00423:         // クリア処理.
00424:          m_pDeviceContext->ClearRenderTargetView( pDstRTV, m_ClearColor );
00425:
00426:          // 出力マネージャに設定.
00427:          m_pDeviceContext->OMSetRenderTargets( 1, &pDstRTV, nullptr );
00428:
00429:          // シェーダリソースビューを設定.
00430:          pSRV = m_PingPong[i * 2 + 0].GetSRV();
00431:          m_pDeviceContext->PSSetShaderResources( 0, 1, &pSRV );
00432:          m_pDeviceContext->PSSetSamplers( 0, 1, &m_pPointSampler );
00433:
00434:          src = CalcBlurParam(w, h, asdx::Vector2(0.0f, 1.0f), deviation, m);
00435:
00436:          m_pDeviceContext->UpdateSubresource( pCB, 0, nullptr, &src, 0, 0 );
00437:          m_pDeviceContext->PSSetConstantBuffers( 0, 1, &pCB );
00438:
00439:          // ステートを設定.
00440:          m_pDeviceContext->RSSetState( m_pRasterizerState );
00441:          m_pDeviceContext->OMSetBlendState( m_pOpequeBS, blendFactor, sampleMask );
00442:          m_pDeviceContext->OMSetDepthStencilState( m_pDepthStencilState, m_StencilRef );
00443:
00444:          // 描画.
00445:          m_Quad.Draw(m_pDeviceContext);
00446:
00447:          // シェーダリソースをクリア.
00448:          ID3D11ShaderResourceView* nullTarget[1] = { nullptr };
00449:          m_pDeviceContext->PSSetShaderResources( 0, 1, nullTarget );
00450:
00451:          w >>= 1;
00452:          h >>= 1;
00453:          m *= 2.0f;
00454:
00455:          pDstRTV = m_PingPong[i * 2 + 2].GetRTV();
00456:          pSrcSRV = m_PingPong[i * 2 + 1].GetSRV();
00457:      }
00458:
00459:      {
00460:          // レンダーターゲットビュー・深度ステンシルビューを取得.
00461:          pDstRTV = m_RenderTarget2D.GetRTV();
00462:          ID3D11DepthStencilView* pDSV = m_DepthStencilTarget.GetDSV();
00463:
00464:          m_pDeviceContext->ClearDepthStencilView( pDSV, D3D11_CLEAR_DEPTH | D3D11_CLEAR_STENCIL, 1.0f, 0 );
00465:
00466:          // 出力マネージャに設定.
00467:          m_pDeviceContext->OMSetRenderTargets( 1, &pDstRTV, pDSV );
00468:
00469:          D3D11_VIEWPORT viewport;
00470:          viewport.TopLeftX   = 0;
00471:          viewport.TopLeftY   = 0;
00472:          viewport.Width      = float(m_Width);
00473:          viewport.Height     = float(m_Height);
00474:          viewport.MinDepth   = 0.0f;
00475:          viewport.MaxDepth   = 1.0f;
00476:
00477:          m_pDeviceContext->RSSetViewports(1, &viewport);
00478:
00479:          // シェーダの設定.
00480:          m_pDeviceContext->VSSetShader( m_pFullScreenVS, nullptr, 0 );
00481:          m_pDeviceContext->GSSetShader( nullptr, nullptr, 0 );
00482:          m_pDeviceContext->HSSetShader( nullptr, nullptr, 0 );
00483:          m_pDeviceContext->DSSetShader( nullptr, nullptr, 0 );
00484:          m_pDeviceContext->PSSetShader( m_pCopyPS, nullptr, 0 );
00485:
00486:          // シェーダリソースビューを設定.
00487:          ID3D11ShaderResourceView* pSRV[] = {
00488:              m_InputTexture.GetSRV(),
00489:              m_PingPong[1].GetSRV(),
00490:              m_PingPong[3].GetSRV(),
00491:              m_PingPong[5].GetSRV(),
00492:              m_PingPong[7].GetSRV(),
00493:              m_PingPong[9].GetSRV(),
00494:              m_PingPong[11].GetSRV()
00495:          };
00496:          m_pDeviceContext->PSSetShaderResources( 0, 6, pSRV );
00497:          m_pDeviceContext->PSSetSamplers( 0, 1, &m_pLinearSampler );
00498:
00499:          // 描画.
00500:          m_Quad.Draw(m_pDeviceContext);
00501:
00502:          // シェーダリソースをクリア.
00503:          ID3D11ShaderResourceView* nullTarget[] = { nullptr, nullptr, nullptr, nullptr, nullptr };
00504:          m_pDeviceContext->PSSetShaderResources( 0, 5, nullTarget );
00505:
00506:          // テキストを描画.
00507:          OnDrawText();
00508:      }
00509:
00510:      // コマンドを実行して,画面に表示.
00511:      m_pSwapChain->Present( 0, 0 );
00512:  }
00007:  ///////////////////////////////////////////////////////////////////////////////////////////////////
00008:  // VSOutput structure
00009:  ///////////////////////////////////////////////////////////////////////////////////////////////////
00010:  struct VSOutput
00011:  {
00012:      float4 Position : SV_POSITION;
00013:      float2 TexCoord : TEXCOORD;
00014:  };
00015:
00016:  //-------------------------------------------------------------------------------------------------
00017:  // Textures and Samplers.
00018:  //-------------------------------------------------------------------------------------------------
00019:  Texture2D       ColorBuffer0  : register(t0);
00020:  Texture2D       ColorBuffer1  : register(t1);
00021:  Texture2D       ColorBuffer2  : register(t2);
00022:  Texture2D       ColorBuffer3  : register(t3);
00023:  Texture2D       ColorBuffer4  : register(t4);
00024:  Texture2D       ColorBuffer5  : register(t5);
00025:  Texture2D       ColorBuffer6  : register(t6);
00026:  SamplerState    ColorSampler : register(s0);
00027:
00028:  float4 FetchColor(Texture2D map, float2 uv)
00029:  {
00030:      float4 output = 0;
00031:      output += map.SampleLevel(ColorSampler, uv, 0);
00032:      return output;
00033:  }
00034:
00035:
00036:  //-------------------------------------------------------------------------------------------------
00037:  //      メインエントリーポイントです.
00038:  //-------------------------------------------------------------------------------------------------
00039:  float4 main(const VSOutput input) : SV_TARGET0
00040:  {
00041:      float4 result = 0;
00042:      result += FetchColor(ColorBuffer0, input.TexCoord);
00043:      result += FetchColor(ColorBuffer1, input.TexCoord);
00044:      result += FetchColor(ColorBuffer2, input.TexCoord);
00045:      result += FetchColor(ColorBuffer3, input.TexCoord);
00046:      result += FetchColor(ColorBuffer4, input.TexCoord);
00047:      result += FetchColor(ColorBuffer5, input.TexCoord);
00048:      result += FetchColor(ColorBuffer6, input.TexCoord);
00049:
00050:      result.w = 1.0f;
00051:      return result;
00052:  }


#PS4share pic.twitter.com/E0QtVnexMi
— Pocol (@ProjectAsura) 2017年12月9日


00256:  //---------------------------------------------------------------------------------------
00257:  //      描画時の処理です.
00258:  //---------------------------------------------------------------------------------------
00259:  void SampleApplication::OnFrameRender( double time, double elapsedTime )
00260:  {
00261:      auto w = m_Width;
00262:      auto h = m_Height;
00263:
00264:      // 減衰率.
00265:      auto a = 0.925f; // [0.9f, 0.95f]の範囲.
00266:
00267:      // 角度オフセット.
00268:      auto rad_offset = asdx::F_PIDIV4;
00269:
00270:      // レンダーターゲットサイズの逆数.
00271:      asdx::Vector2 inv_size(1.0f / w, 1.0f / h);
00272:
00273:      float clearColor[4] = { 0, 0, 0, 1 };
00274:      m_pDeviceContext->ClearRenderTargetView( m_WorkBuffer[3].GetRTV(), clearColor );
00275:
00276:      // 実験のため4方向固定.
00277:      for(auto j=0; j<4; ++j)
00278:      {
00279:          // サンプリング方向.
00280:          asdx::Vector2 dir(
00281:              cosf(asdx::F_2PI * 0.25f * j + rad_offset),
00282:              sinf(asdx::F_2PI * 0.25f * j + rad_offset)
00283:          );
00284:
00285:          auto pSRV = m_InputTexture.GetSRV();
00286:
00287:          // 3パスでピンポンブラー.
00288:          for(auto i=0; i<3; ++i)
00289:          {
00290:              auto pDstRTV = m_WorkBuffer[i].GetRTV();
00291:
00292:              // クリア処理.
00293:              m_pDeviceContext->ClearRenderTargetView( pDstRTV, m_ClearColor );
00294:
00295:              // 出力マネージャに設定.
00296:              m_pDeviceContext->OMSetRenderTargets( 1, &pDstRTV, nullptr );
00297:
00298:              float blendFactor[4] = { 1.0f, 1.0f, 1.0f, 1.0f };
00299:              UINT sampleMask = D3D11_DEFAULT_SAMPLE_MASK;
00300:              // ステートを設定.
00301:              m_pDeviceContext->RSSetState( m_pRasterizerState );
00302:              m_pDeviceContext->OMSetBlendState( m_pOpequeBS, blendFactor, sampleMask );
00303:              m_pDeviceContext->OMSetDepthStencilState( m_pDepthStencilState, m_StencilRef );
00304:
00305:              D3D11_VIEWPORT viewport;
00306:              viewport.TopLeftX   = 0;
00307:              viewport.TopLeftY   = 0;
00308:              viewport.Width      = w;
00309:              viewport.Height     = h;
00310:              viewport.MinDepth   = 0.0f;
00311:              viewport.MaxDepth   = 1.0f;
00312:
00313:              m_pDeviceContext->RSSetViewports( 1, &viewport );
00314:
00315:              BlurParam src = {};
00316:              for(auto s=0; s<16; ++s)
00317:              {
00318:                  auto b = powf(4.0f, i);
00319:                  src.Offset[s].x = dir.x * (b * s) * inv_size.x;
00320:                  src.Offset[s].y = dir.y * (b * s) * inv_size.y;
00321:                  src.Offset[s].z = powf(a, (b * s));
00322:              }
00323:
00324:              auto pCB = m_BlurBuffer.GetBuffer();
00325:              m_pDeviceContext->UpdateSubresource( pCB, 0, nullptr, &src, 0, 0 );
00326:              m_pDeviceContext->PSSetConstantBuffers( 0, 1, &pCB );
00327:
00328:              // シェーダリソースビューを設定.
00329:              m_pDeviceContext->PSSetShaderResources( 0, 1, &pSRV );
00330:              m_pDeviceContext->PSSetSamplers( 0, 1, &m_pPointSampler );
00331:
00332:              // シェーダの設定.
00333:              m_pDeviceContext->VSSetShader( m_pFullScreenVS, nullptr, 0 );
00334:              m_pDeviceContext->GSSetShader( nullptr, nullptr, 0 );
00335:              m_pDeviceContext->HSSetShader( nullptr, nullptr, 0 );
00336:              m_pDeviceContext->DSSetShader( nullptr, nullptr, 0 );
00337:              m_pDeviceContext->PSSetShader( m_pStarPS, nullptr, 0 );
00338:
00339:              // 描画.
00340:              m_Quad.Draw(m_pDeviceContext);
00341:
00342:              // シェーダリソースをクリア.
00343:              ID3D11ShaderResourceView* nullTarget[1] = { nullptr };
00344:              m_pDeviceContext->PSSetShaderResources( 0, 1, nullTarget );
00345:
00346:              // 次のパスの入力を更新.
00347:              pSRV = m_WorkBuffer[i].GetSRV();
00348:          }
00349:
00350:          // WorkBuffer[3]に加算合成.
00351:          {
00352:              auto pDstRTV = m_WorkBuffer[3].GetRTV();
00353:
00354:              // 出力マネージャに設定.
00355:              m_pDeviceContext->OMSetRenderTargets( 1, &pDstRTV, nullptr );
00356:
00357:              float blendFactor[4] = { 1.0f, 1.0f, 1.0f, 1.0f };
00358:              UINT sampleMask = D3D11_DEFAULT_SAMPLE_MASK;
00359:              m_pDeviceContext->OMSetBlendState( m_pAdditiveBS, blendFactor, sampleMask );
00360:
00361:              // シェーダの設定.
00362:              m_pDeviceContext->VSSetShader( m_pFullScreenVS, nullptr, 0 );
00363:              m_pDeviceContext->GSSetShader( nullptr, nullptr, 0 );
00364:              m_pDeviceContext->HSSetShader( nullptr, nullptr, 0 );
00365:              m_pDeviceContext->DSSetShader( nullptr, nullptr, 0 );
00366:              m_pDeviceContext->PSSetShader( m_pCopyPS, nullptr, 0 );
00367:
00368:              pSRV = m_WorkBuffer[2].GetSRV();
00369:              m_pDeviceContext->PSSetShaderResources( 0, 1, &pSRV );
00370:              m_pDeviceContext->PSSetSamplers( 0, 1, &m_pPointSampler );
00371:
00372:              // 描画.
00373:              m_Quad.Draw(m_pDeviceContext);
00374:
00375:              // シェーダリソースをクリア.
00376:              ID3D11ShaderResourceView* nullTarget[1] = { nullptr };
00377:              m_pDeviceContext->PSSetShaderResources( 0, 1, nullTarget );
00378:          }
00379:      }
00380:
00381:      // コンポジット.
00382:      {
00383:          // レンダーターゲットビュー・深度ステンシルビューを取得.
00384:          auto pDstRTV = m_RenderTarget2D.GetRTV();
00385:          ID3D11DepthStencilView* pDSV = m_DepthStencilTarget.GetDSV();
00386:
00387:          m_pDeviceContext->ClearDepthStencilView( pDSV, D3D11_CLEAR_DEPTH | D3D11_CLEAR_STENCIL, 1.0f, 0 );
00388:
00389:          // 出力マネージャに設定.
00390:          m_pDeviceContext->OMSetRenderTargets( 1, &pDstRTV, pDSV );
00391:
00392:          D3D11_VIEWPORT viewport;
00393:          viewport.TopLeftX   = 0;
00394:          viewport.TopLeftY   = 0;
00395:          viewport.Width      = m_Width;
00396:          viewport.Height     = m_Height;
00397:          viewport.MinDepth   = 0.0f;
00398:          viewport.MaxDepth   = 1.0f;
00399:
00400:          m_pDeviceContext->RSSetViewports(1, &viewport);
00401:
00402:          float blendFactor[4] = { 1.0f, 1.0f, 1.0f, 1.0f };
00403:          UINT sampleMask = D3D11_DEFAULT_SAMPLE_MASK;
00404:          // ステートを設定.
00405:          m_pDeviceContext->RSSetState( m_pRasterizerState );
00406:          m_pDeviceContext->OMSetBlendState( m_pOpequeBS, blendFactor, sampleMask );
00407:          m_pDeviceContext->OMSetDepthStencilState( m_pDepthStencilState, m_StencilRef );
00408:
00409:          // シェーダの設定.
00410:          m_pDeviceContext->VSSetShader( m_pFullScreenVS, nullptr, 0 );
00411:          m_pDeviceContext->GSSetShader( nullptr, nullptr, 0 );
00412:          m_pDeviceContext->HSSetShader( nullptr, nullptr, 0 );
00413:          m_pDeviceContext->DSSetShader( nullptr, nullptr, 0 );
00414:          m_pDeviceContext->PSSetShader( m_pCompositePS, nullptr, 0 );
00415:
00416:          // シェーダリソースビューを設定.
00417:          ID3D11ShaderResourceView* pSRV[] = {
00418:              m_InputTexture.GetSRV(),
00419:              m_WorkBuffer[3].GetSRV(),
00420:          };
00421:          m_pDeviceContext->PSSetShaderResources( 0, 2, pSRV );
00422:          m_pDeviceContext->PSSetSamplers( 0, 1, &m_pLinearSampler );
00423:
00424:          // 描画.
00425:          m_Quad.Draw(m_pDeviceContext);
00426:
00427:          // シェーダリソースをクリア.
00428:          ID3D11ShaderResourceView* nullTarget[] = { nullptr, nullptr, nullptr, nullptr, nullptr };
00429:          m_pDeviceContext->PSSetShaderResources( 0, 2, nullTarget );
00430:
00431:          // テキストを描画.
00432:          OnDrawText();
00433:      }
00434:
00435:      // コマンドを実行して,画面に表示.
00436:      m_pSwapChain->Present( 0, 0 );
00437:  }
00007:  ///////////////////////////////////////////////////////////////////////////////////////////////////
00008:  // VSOutput structure
00009:  ///////////////////////////////////////////////////////////////////////////////////////////////////
00010:  struct VSOutput
00011:  {
00012:      float4 Position : SV_POSITION;
00013:      float2 TexCoord : TEXCOORD;
00014:  };
00015:
00016:  ///////////////////////////////////////////////////////////////////////////////////////////////////
00017:  // CbBlur buffer
00018:  ///////////////////////////////////////////////////////////////////////////////////////////////////
00019:  cbuffer CbBlur : register(b0)
00020:  {
00021:      float4 Offsets[16];
00022:  };
00023:
00024:  //-------------------------------------------------------------------------------------------------
00025:  // Textures and Samplers.
00026:  //-------------------------------------------------------------------------------------------------
00027:  Texture2D       ColorMap : register(t0);
00028:  SamplerState    ColorSmp : register(s0);
00029:
00030:
00031:  //-------------------------------------------------------------------------------------------------
00032:  //      メインエントリーポイントです.
00033:  //-------------------------------------------------------------------------------------------------
00034:  float4 main(const VSOutput input) : SV_TARGET0
00035:  {
00036:      float4 result = 0;
00037:
00038:      [unroll]
00039:      for(int i=0; i<16; ++i)
00040:      { result += Offsets[i].z * ColorMap.SampleLevel(ColorSmp, input.TexCoord + Offsets[i].xy, 0); }
00041:
00042:      return result;
00043:  }

